
“There was a time when people said, ‘Jim, if you keep on making faces, your face will freeze like that.’ Now they just say, ‘Pay him!’
-Jim Carrey

My name is Jim Burnham. I am a US photographer. Follow me on Instagram or Twitter -> @BurnhamArts
I thought it would be fitting if I followed up my fire article with something frozen. The last two weeks in central Illinois have been cold to say the least with the coldest reaching -14F. This looked like the last day I was going to be able to try frozen bubble photography so I loaded up on YouTube videos tutorials and headed to the arctic confines of…my porch. Hey, it’s not as windy there.
The following photos were taken with my Nikon D7100 with a Sigma 18-250mm telephoto at or near 250mm.
ISO: 100
F-Stop: f11
Shutter Speed:
White background: 1/160-1/200 sec.
Black background 1/60 – 1/100sec
Ingredients
- Bubble soap
- Sugar and/or Corn Syrup
- Tube (with a wide enough opening to get a big bubble)
I’m using the tube the bubble solution came in. I’m not going to use the wand in the bubble tube because it’s not controllable. I dumped the soap into a container and then cut the end off the tube. I am going to use one end to collect the soap and the other end to blow the bubble. (Note: Pineapples and bananas are not required, unless you plan to make a daiquiri later.)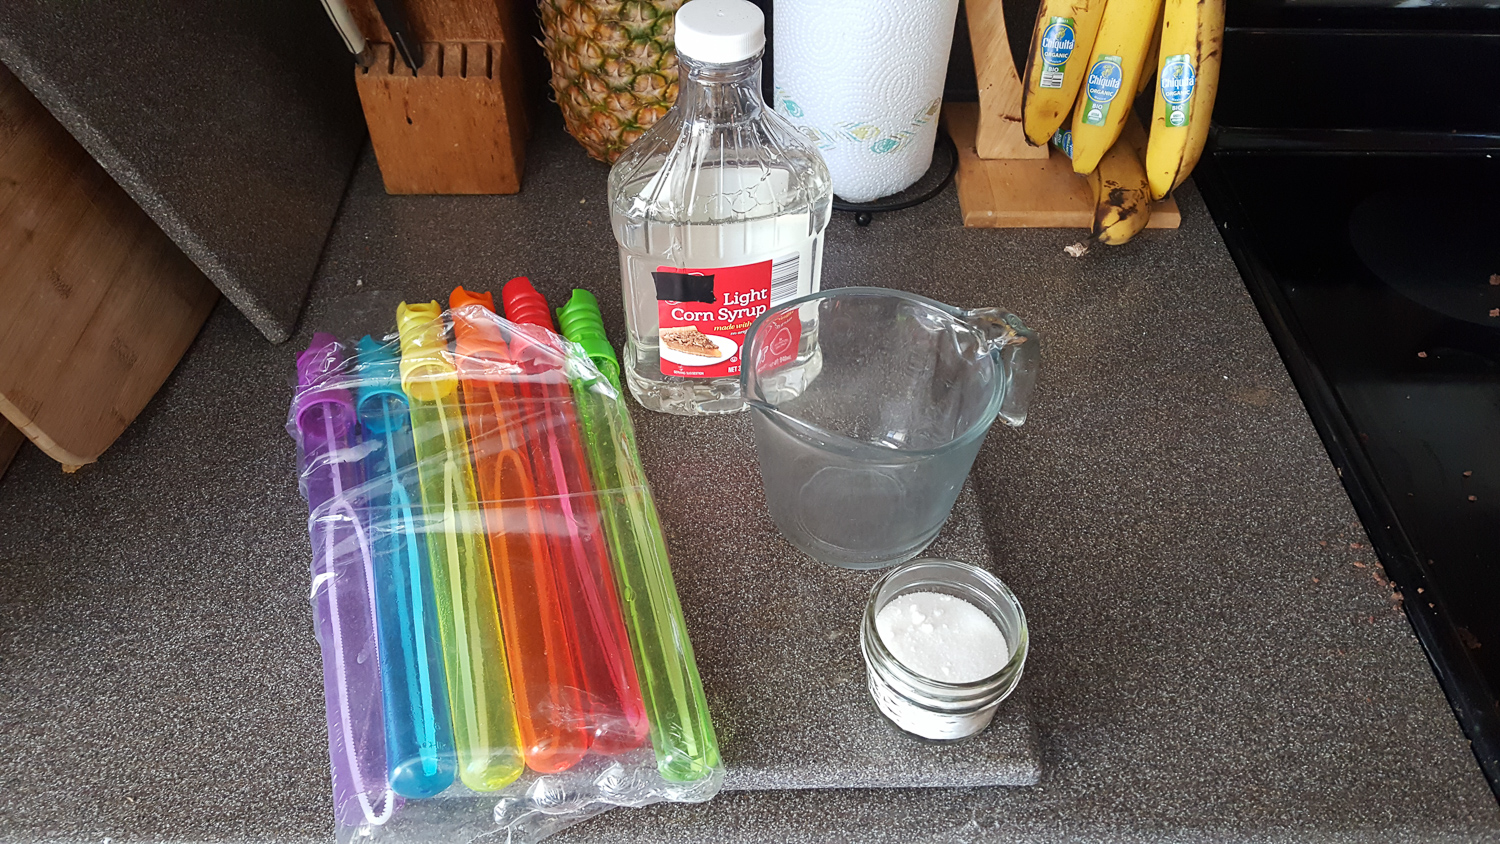
Clothing
- Dress warm, it is negative temperature, after all. I’m close to being indoors, but I’ve got on two pairs of socks, thermal underwear and this jacket is rated to -40 degrees. I have fingerless gloves that also double as mittens. The furry hat is warm, and it looks awesome, too.

Tripod
- Use a tripod, if shooting at night or with a dark background. This also frees your hands up so you can keep them in your gloves longer.
Camera
- Have a camera with manual settings, focus and exposure. This is not required, but to get consistent results, it’s best to start with a consistent exposure and fine tune adjustments from there. Preset your focus in AF mode and then turn it off so the camera is not searching for focus. If needed, fine-tune the focus manually.
Lens
- Use a macro lens or a zoom lens or in my case, a Macro-Zoom. You will be zoomed in close at close range in order to throw the background out of focus. I was at 250mm.
Background
- Pick a simple background that is not cluttered. You can use a white or black background. A black background will better highlight the fine shaped within the crystals. I used a full sheet of black foamboard. For a white background, I just used the snowy landscape.
Lighting
- You need to have a well lit area. To highlight structures forming in the bubble, use a side-light. When I took these this morning, I had the sun coming in directly from the side. If you are in a dark area, you can use a flashlight.
- If using flash, don’t flash directly from the camera’s built-in flash because it will cause a hot spot right in the middle of the bubble. If the light is directly to the left or right, the hotspot will be off to that side and it will not be as prominent.
Working Area
- Find a place with no wind, a shaky bubble will pop quicker. You want one that will last at least 20-30 seconds.
- Create a flat surface and find some snow to act as a base. Create a small depression for the bubble to sit in and give it a wintery look.
Background
- With a white background, my aperture was at f11 and my shutter speed was between 1/160 and 1/200 at ISO100. When I had the dark background, the shutter speed slowed down by up to two stops to 1/50 or 1/60. In order to keep the shutter at 1/200, I would have had to widen the aperture to the max f5.6 (at 250mm on my macro-zoom lens). You might need to do this if the crystals are moving around and you need to stop action.
White background:
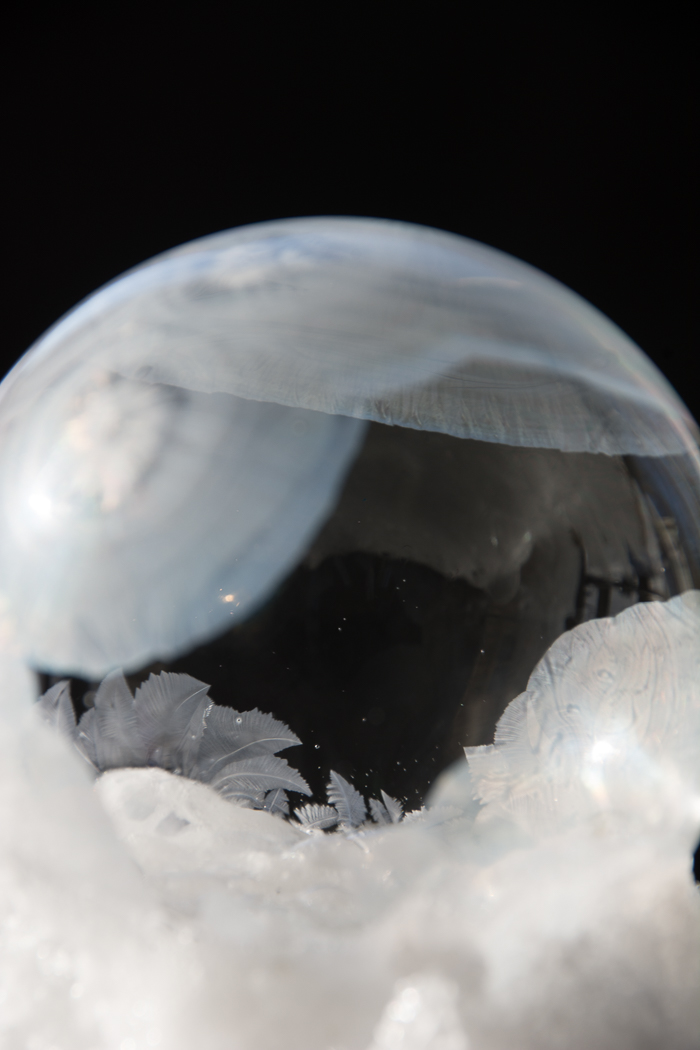
 Black background:


Exposure settings
- I started at f11 and I manually focused on the base of the bubble. Use the snow to set your shutter speed to not blow out the highlights. Use your histogram and blinkies if you have them to warn you if you ware over exposed. Get the show exposed correctly and you will get the bubble exposed correctly.
- You could use any aperture you want, but be wary of how close you are and how tight the depth of field is. I just used f11 in order to get more sharpness from front to back. However, using a black background will require more shutter time. If you want to keep the fast shutter, you will have to go with a wider (smaller f number) aperture.
Bubble Mixture and Test Run
- Try making bubbles to sit on top of the snow. You’ll find that the soap on its own is probably not enough. This solution is too weak to support itself once it starts to freeze and it will pop.
- To thicken up the solution, you can add sugar or corn syrup to the mix. I started with sugar, but I found I couldn’t add enough sugar to keep the bubble from popping.
- After adding a couple ounces of corn syrup, I was able to get a sustainable bubble.
- At room temperature, it’s too warm to be effective. The longer you wait for the solution to cool down, the longer your bubble will last. You will have to experiment a few times until you start getting consistent bubbles.

Photographs and video
- You will be able to see the convection currents moving around inside the bubble! That’s because the skin of the bubble consists of two layers of soap with a layer of water in the middle. This is where the crystals form first since the soap freezes at a lower temperature than the water.
- The best crystal formations move up from the coldest area where the snow and air meet the bubble. These will appear to grow from the base. You will see other crystals forming in circles moving around with the current, but the best crystals are usually at the bottom.
- At this point, you can move the camera closer and focus on different parts of the bubble or record the whole process. I found the most interesting thing is watching the freezing process from start to finish.
- I shot the following video showing how quickly the frost will appear. I sped up to 1.5X regular speed, but the freezing does occur fairly fast. If it’s really cold you should see the whole bubble freeze within 20-30 seconds giving you plenty of time to take photos of it.
Thanks for reading. If you made it this far, congratulations! Please like and share or comment and share or pass it on and share using the social links below. If you would like an email when new posts are added, add your email below. Follow me on Instagram or Twitter: @BurnhamArts